
Oven. Check. Long-handled utensil for adding items to, and removing items from the oven. Check. Lovely discs, topped with various ingredients in need of baking. Check. I’m not actually making pizza, but enamelling does feel a bit like I’m cooking up a miniature storm in the kitchen. The fact that il forno means both oven and kiln helps to reinforce the association. My toppings, however, are pure silver wire and ground glass powders of various hues, and my base is copper rather than dough. As with pizza though, the right ingredients, timing and temperature control are all crucial in order to achieve a palatable end result. And while the health inspector might go easier on me than a pizza chef for sneezing, recent experience has taught me that to do so whilst enamelling, can produce a scene reminiscent of Al Pacino in Scarface, wearing a significant dusting of cocaine down his front.
The enamelling process I’m currently learning, which requires a steady hand and a good degree of patience, is called cloisonné, and dates back to the 13th century B.C. This technique gets its name from the French word cloison, meaning partition. I can’t help thinking of nuns walled up in a convent. As this blog has a varied audience, I’ll ask the initiated to bear with me while I describe the process! A foundation layer of enamel powder was dusted onto the copper base to begin with, using a small sieve. The powder-dusted copper base was then fired in the kiln for a couple of minutes, which resulted in a glossy blank canvas on which to build an image.


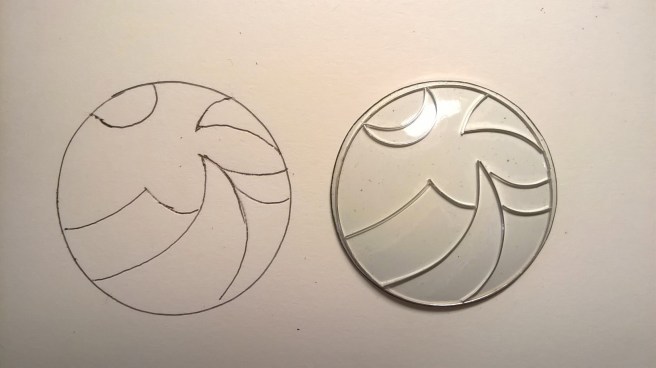
Flat pieces of silver wire were then cut to form the outline of an image on the surface. I drew a simple wave with a crescent moon on paper, and then cut the silver and curved it to fit the lines of the drawing. The cut silver wire was then transferred, piece by piece, to the ‘blank canvas’ metal disc and lightly held in place with a weak liquid gum, applied using a paintbrush. This part of the process was punctuated with exasperated utterances as the silver wire refused to stay where it should have!

Once the desired arrangement was achieved, the piece was reintroduced to the kiln and the metal settled into the molten enamel. Sometimes the metal wire didn’t want to conform to the slightly domed shaped of the copper base and had to be tapped and prodded with a metal poker while still hot and malleable in the kiln. This required a light touch, as over-zealous tapping could send your beautifully arranged pieces of silver wire sliding in every direction, resulting in a weirdly abstract disaster!
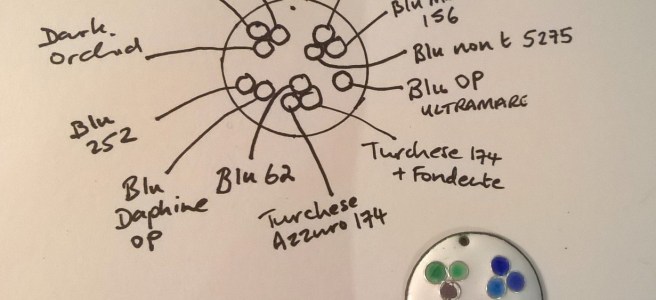
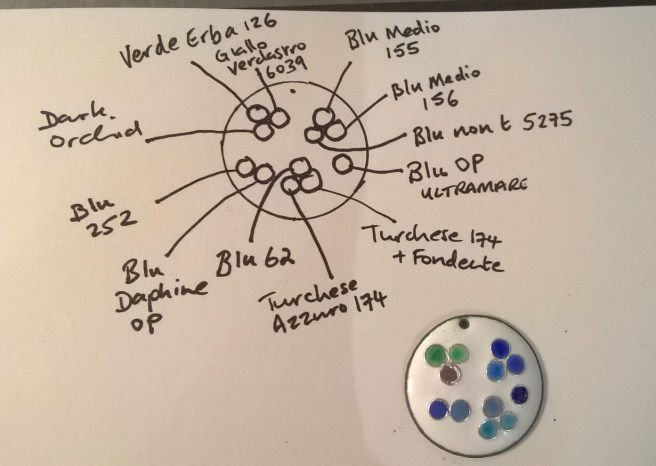
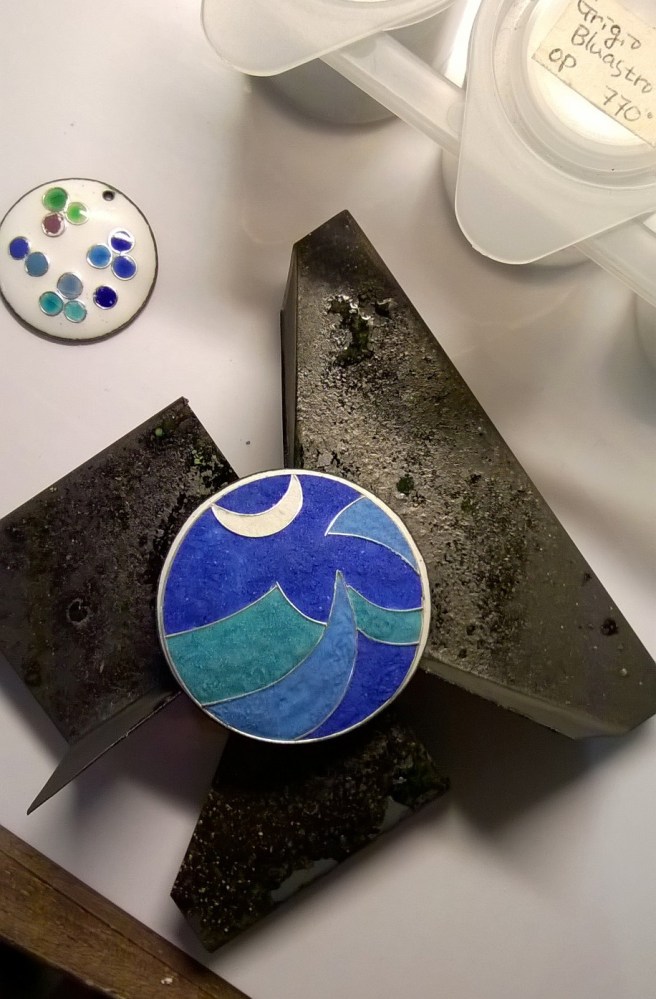
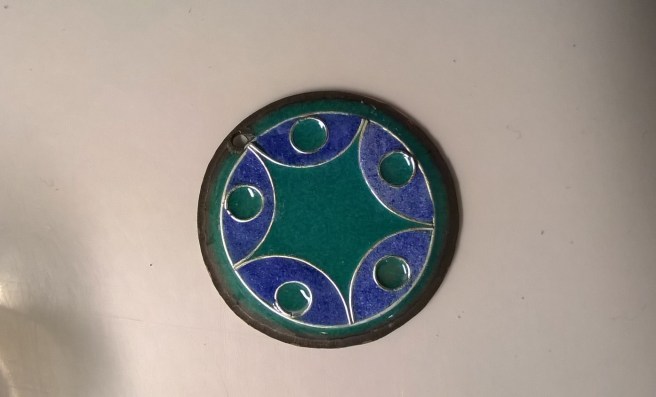
Once the metal wires had been successfully embedded in the base layer of enamel, they could act as partitions for various colours, and the in-filling step could begin. In order to achieve the desired colours, it was necessary to create a test piece. I made twelve little silver rings to contain each of the colours I wanted to try. The position of each colour was documented in order to keep track of them, and facilitate the selection of the correct colours for the wave piece. My diagram ended up bearing quite a resemblance to some bygone biology homework, but it was very useful in selecting the colours I needed. After the wave experiment emerged successfully from the kiln, I tried a smaller, more geometric pattern of curves and circles.


Each step of the process was an exercise in precision and patience. Every time I opened the kiln and whisked out my red hot experiment, I held my breath in anticipation. With all of the convenient modern equipment at my disposal, there was no guarantee of success. Temperature and timing fluctuations, or material impurities, could produce a range of unpredictable colours or surface textures. The silver wire could expand and break out of its painstakingly formed circles and ellipses. And getting caught in a stilted conversation (in woefully bad Italian, about wood grain of all things), when I should have been glued to my stopwatch really wasn’t best practice! So I am now even more awestruck by the work of ancient enamellers, produced without stopwatches or thermostatically-controlled, thermally-efficient kilns or laboratory-grade pigments. I like to ponder who the very first individual to discover enamelling was, and how exactly they did so. Was it a logical process of experimentation and discovery by an artisan, or the accidental destruction, and transformation of a glass bead in a blacksmith’s forge? Were there subsequent grateful salutations to whatever gods were popular in that place and time?
Enamelled jewellery has been associated with ancient Mycenaean, Roman, Middle-Eastern and Celtic cultures among others, and recurs and flourishes through the centuries, surviving relatively unchanged up to the present day. In our visually over-stimulated modern lives it’s easy to forget the impact these expertly-made pieces would originally have had. Now that I understand the process better, I appreciate their craftsmanship all the more. I’ve mentioned it in previous blog posts, but this connection to the past is something I increasingly enjoy about making jewellery. I might prefer a more contemporary style, but in learning these techniques I can feel a connection with people a hundred generations back, which transcends cultural and geographic boundaries. We are still humans on a rock, forming our material culture with the same dextrous hands, curious minds and trichromatic vision.
